After data has been imported, now you can proceed with making corrections.
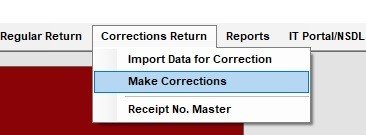
In order to select Make Corrections click on 
Make Correction can also be selected by clicking on shortcut provided within the list of short cut buttons. Ref. to above fig
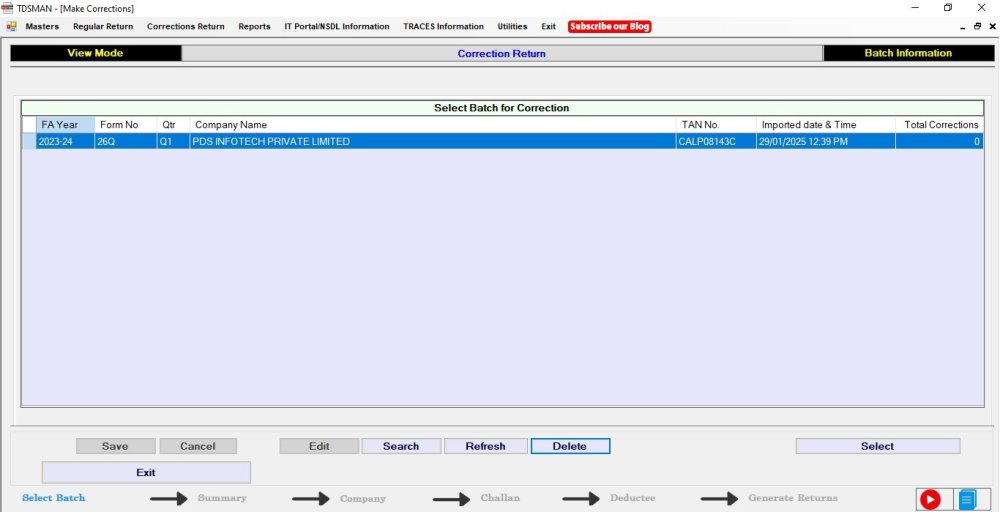
The following window appears which assists you in preparing the file for making correction.
Here you will be able see the all the TDS files that you have made for preparing correction returns. Every import is a separate batch and you will be able to differentiate all by looking at the summary of that batch shown in the grid along with the date and time at which the file was imported.
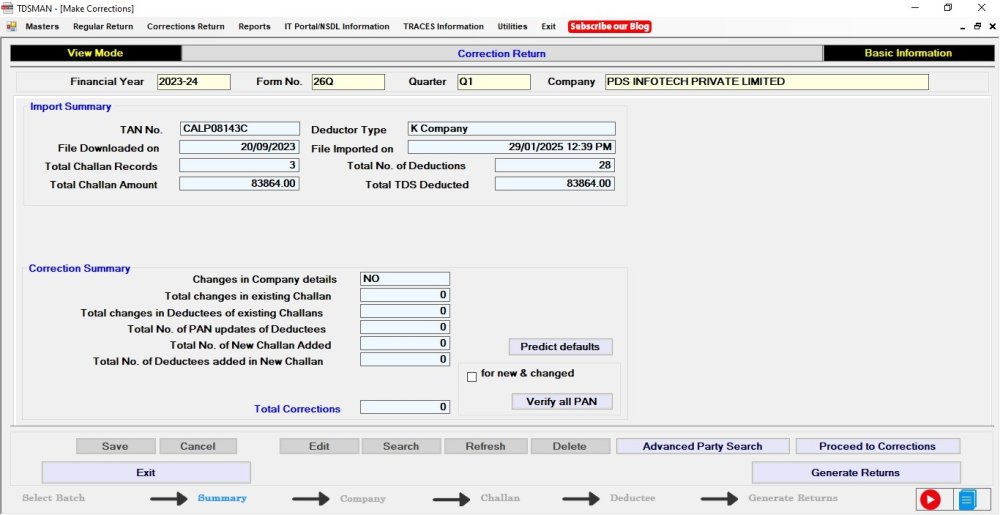
Use your mouse to select a batch and either double click on the batch or click on ‘Select’ button to enter into the Batch for making corrections. Once you enter the batch the following window appears:
In this Interface you will be able to see the data summary and also the count of the corrections that you have done in this particular batch.
Note : After making the corrections, you have to return back to this page for generation of correction return file.
To make the Corrections, click on 
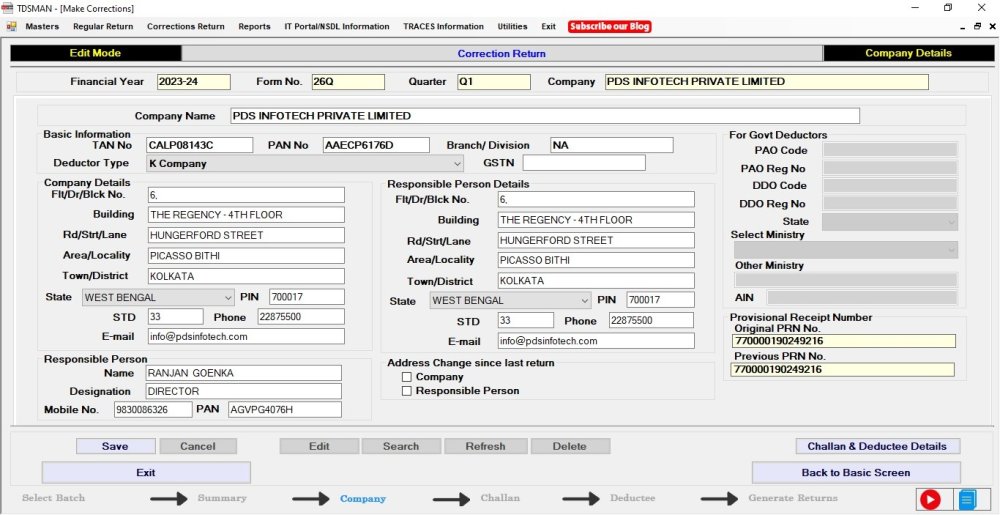
Correction in Company details :
If required, you can modify the company details over here and click on the 
Note: TAN of the company, Financial Year, Form No. & Quarter cannot be modified for the return.
To make any correction in the Challan or Deductee Details, click on 
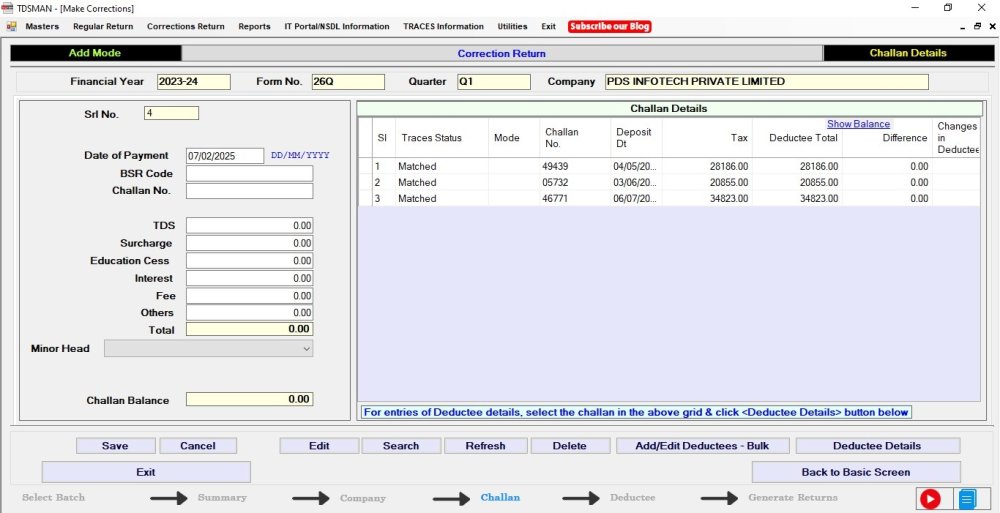
Correction in Challans
The above screen is divided into three sections:
i. The left panel is the area where data has been entered
ii. The right panel displays all the records.
iii. The bottom part has the self labeled action buttons
Modify a Challan
In order to modify a challan, select the challan you need to modify, from the right panel with the help of the mouse. Either double click on this entry or click on the ‘Edit’ button. The selected entry will be displayed on the left panel which can now be modified and saved again.
Note: For matched challan, provisionally matched challan& over booked challan only interest allocated amount and others allocated amount can be updated.Correction in Deductee Details
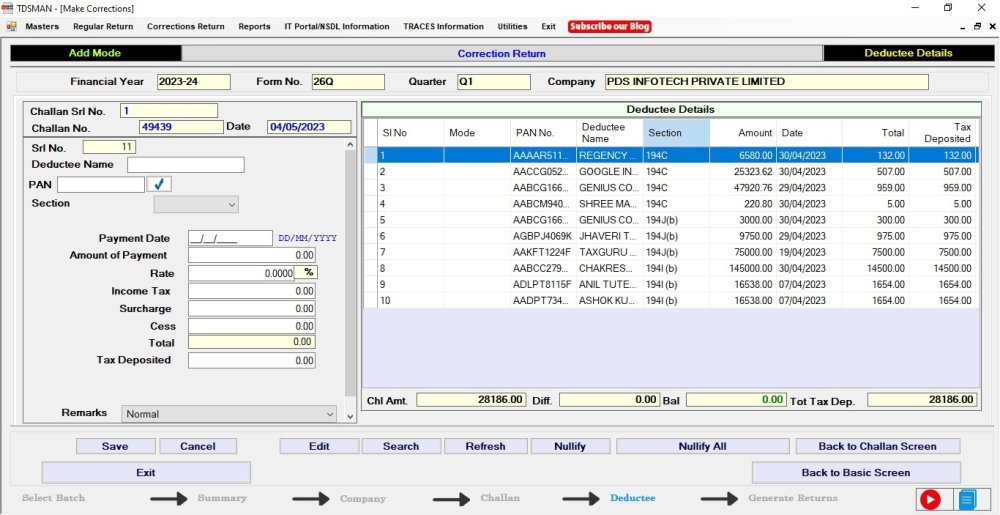
Select the Challan against which contains the particular Deductee record in which the correction has to be done and click on 
The above screen is divided into three sections:
- The left panel is the area where data has to be entered
- The right panel displays records as you keep on entering
- The bottom part has the self labeled action buttons
Add Deductee
To add a deductee, enter the details in the left panel. The brief description of all the fields has been explained in Regular returns section.
After entering, click on the ‘Save button’ to record the new challan in the return.
 button.
Modify Deductee
In order to modify a deductee, select the deductee you need to modify, from the right panel with the help of the mouse. Either double click on this entry or click on the ‘Edit’ button. The selected entry will be displayed on the left panel which can now be modified and saved again.
Note: If Deductee record is marked with Higher Rate flag then changes are only allowed in Payment Amount, Payment Date, and PAN of the Deductee.In case the PAN has to be modified, it has to be a valid PAN. For example, while preparing for regular returns the system allows us to modify PAN to “PANNOTAVBL”, “PANINVALID” and “PANAPPLIED”, however the same in not possible while making corrections.
Nullify Deductee
In order to nullify a deductee, select the deductee you need to nullify, from the right panel with the help of the mouse. After selecting the record click on ‘nullify’ button, then after seeking your reconfirmation the record will be nullified.
Note: Original deductees that have been imported cannot be deleted. You can only delete the new deductees that have been entered during correction. In case one wish to clear the record of existing deductee then one has to modify all the amount values to zero.Correction in Salary Details
Corrections, in salary detail as entered in Quarter 4 of Form 24Q can be done by clicking on ‘Salary Detail’ on the company details screen. The following window will be displayed for correction in the salary details:
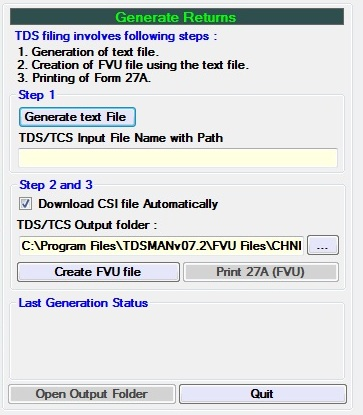 Figure 7-9 Generate Correction Returns
Add Salary details
In this section we concentrate on entering/modifying salary details for each employee.
The above screen is divided into three sections:
- The left panel is the area where data has to be entered
- The right panel displays records as you keep on entering
- The bottom part has the self labeled action buttons
Enter the salary details on the left panel as per the field/columns. After providing the details of each record click on the ‘Save’ button. The saved entry will be displayed on the right panel. As you keep on making more entries, keep saving each record and list of all the records will get displayed on the right panel.
Modify Salary record
In order to modify a salary record, select the record you need to modify, from the right panel with the help of the mouse. Either double click on this entry or click on the ‘Edit’ button. The selected entry will be displayed on the left panel which can now be modified and saved again
Delete Salary record
In order to delete a salary record, select the record you need to delete, from the right panel with the help of the mouse. After selecting the record click on ‘Delete’ button, then after seeking your reconfirmation the record will be deleted.
Need more help with this?
TDSMAN - Support


